
Whether you are crafting custom signage, personalizing consumer goods, or manufacturing precise industrial components, laser engraving plastic is a highly versatile and rewarding process. However, plastics are notoriously diverse. The same laser settings that produce a beautiful, frosted logo on one type of acrylic might cause a bubbling, melted mess on another material entirely.
Mastering this craft requires a solid understanding of your machinery, material science, and proper safety protocols. Let’s dive into the essential techniques, settings, and pro tips to help you achieve flawless results every time you work with polymers.
Understanding the Technology: Lasers and Methods
Before loading a sheet of polymer into your machine, it is vital to understand the basic mechanics of how lasers interact with synthetic materials.
Etching vs. Marking
Many beginners use these terms interchangeably, but understanding etching versus marking differences is key to achieving your desired aesthetic.
Laser Etching: This process physically removes the top layer of the material, creating a shallow cavity. It’s highly tactile and ideal for deep, permanent branding.
Laser Marking: This technique relies on the heat of the laser to cause a chemical reaction just below the material's surface, changing its color without significantly altering its texture.
Choosing the Right Laser
Your results will heavily depend on your equipment. When comparing CO2 vs fiber laser marking, CO2 lasers are generally the industry standard for organic materials and most plastics, offering excellent cutting and etching capabilities. Fiber lasers, on the other hand, are highly specialized for metals but excel at high contrast industrial resin marking, producing crisp, dark marks on specific engineered plastics without deeply penetrating the surface.
Selecting the Right Materials
Not all plastics are created equal. Identifying the best plastics for CO2 lasers will save you time, money, and frustration.
Top Choices for Engraving
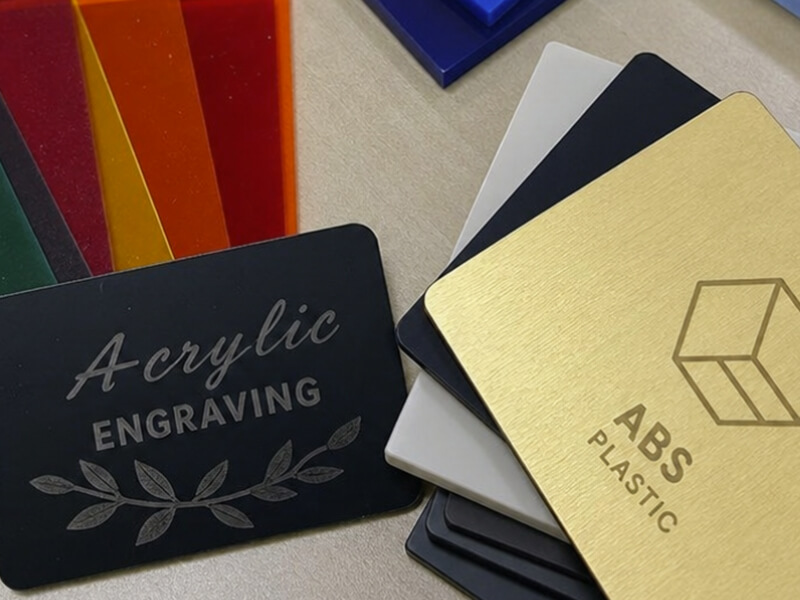
- Acrylic: This is arguably the most popular choice. Engraving clear cast acrylic yields a beautiful, frosty white contrast that is perfect for LED edge-lit signs and awards. Extruded acrylic, conversely, cuts cleanly but engraves relatively clear, lacking contrast.
- ABS Plastic: Laser engraving abs plastic is incredibly popular for two-layer signage (like name tags or electrical panels). The laser removes the top color to reveal a contrasting core.
- Delrin (POM): Highly durable and fantastic for mechanical parts, Delrin engraves smoothly with a bright white contrast.
Mastering the Process: Settings and Techniques
The biggest hurdle when laser etching plastic is managing heat. Unlike wood, which burns, plastic melts.
Beating the Heat
Preventing polymer melt during engraving relies on the perfect balance of speed and power.
Use High Speeds: Move the laser head as fast as your machine allows while maintaining accuracy.
Lower the Power: Start with a lower power setting and increase it incrementally. It is better to run two light passes than one heavy, melt-inducing pass.
Air Assist: Use compressed air directed at the laser's focal point to blow away excess heat and vaporized plastic instantly.
Dialing in Your Settings
When determining the ideal laser settings for ABS sheets, keep in mind that the top color layer is incredibly thin. High power will blast right through the core, causing warped, raised edges. Opt for high speed, low power, and a single pass.
Furthermore, resolution matters. While it might be tempting to use the highest resolution possible, the optimal DPI for plastic text usually hovers around 300 to 500 DPI. Pushing your resolution to 1000 DPI means the laser dots overlap significantly, concentrating too much heat in one area and causing the text to melt and blur.
Pro Tips for a Flawless Finish
Even with perfect settings, plastic can be finicky. Here are a few advanced techniques to elevate your final product.
Surface Protection
One of the best-kept secrets of professional makers is the application of laser masking tape. Applying a wide, medium-tack paper tape over your plastic surface before engraving prevents vaporized residue from settling back onto the workpiece. Once the engraving is done, simply peel off the tape for a pristine surface.
Post-Processing Cleanup
If you opted not to use tape, you might find a smoky haze around your design. When removing scorch marks from acrylic, avoid harsh solvents like acetone, which will cause the plastic to "craze" (develop micro-cracks). Instead, use a soft microfiber cloth with a dedicated plastic cleaner or a small amount of isopropyl alcohol—but apply the alcohol sparingly and wipe it away immediately.
Practical Application: Phone Cases
Personalized tech accessories are a booming market. A few custom phone case engraving tips to keep in mind: most modern phone cases are made of TPU (Thermoplastic Polyurethane) or silicone. TPU engraves very well, often melting slightly to create a debossed, tactile feel. Always use a scrap case to test your settings, and consider using a soft-bristle toothbrush and mild dish soap to scrub the engraving out afterward, removing any sticky residue left behind by the laser.
Final Thoughts
The key to successfully laser engraving plastic lies in patience and testing. By understanding the chemical nature of your materials, adhering to strict safety protocols, and meticulously fine-tuning your speed, power, and DPI, you can transform simple plastic sheets into premium, high-quality products. Grab some scrap material, fire up your exhaust fan, and start experimenting with these techniques today!